Sunday, July 17, 2011

History......  It all really started about 15 + years ago, around 1994-ish.  I took a trip to Grayling to a canoe and kayak shop, why you ask......not really sure, I suppose it was for something to do.  Anyway, this was a time before you could buy a plastic kayak at your local Dunhams or sporting goods store.  I was looking around admiring the boats when the salesman asked if I needed anything, I said I was just browsing but he offered to let me take one out for a spin in the pond/flooding area out back.  He fitted me with a spray skirt, paddle and boat, took me to the landing and showed me the proper way to enter the kayak from the dock.  He gave me a few pointers and off I went.  All I can really say is WOW...... I wanted one in the worst way, but financially it was not going to happen.  I believe this kayak was either a Dagger or perception, 18 foot, touring model with rudder and if memory serves me correctly was @ $1500.  That was the cheap model...... yeah right!!

Flash forward to July, 2011.....
Needing a new hobby like I need a hole in my head, I began to research kayaks again.  I have looked at them over the years since first being introduced so many years ago and have still always wanted one. I searched and searched looking at several models and emailing owners and designers to ask their opinions on whether or not a particular kayak would be suited for me.  I'm not a small guy by any means and weighing in at 260lbs, with a size 12 1/2 shoe I wanted to make sure I'd fit.   A few of the kayaks I'd researched were the Guillemont "L" and the Chesapeake "18" by CLC kayks, the Outer Island by Jay Babina and finally the North Star by Laughing Loon.  Finally a decision was made, and the winner is.........  The North Star.  Why?  I loved the lines, the reviews were great and one link on the Laughing loon website.... Etienne Muller's boat building - The North Star.  I read his review, looked at his pictures and even sent him a quick email introducing myself and asking a few questions.  He was very quick to respond and was very encouraging.  SOLD.  Check out his site, he has a great website.  LINK

So without further a due....my account of building the North Star kayak by Laughing Loon.

The following is the set-up process, use tabs at top to see different processes.


I ordered the plans on a Tuesday, received them on Friday!!  Very quick turn around from Rob Macks at Laughing loon.  THANKS!!!   Along with the plans (only 1 page shown but there are more) I also received a  very comprehensive step by step instruction booklet.


The first thing I did was create the strong back... (well I had to clean out the shop first)  I made sure it was level and straight.  The strong back is what the entire kayak will be built on.


I made copies of the stations and cut them out of MDF, I cut them out a little proud of the hull line then followed up with the belt sander. All vertical and shear lines were transferred making sure to be as accurate as possible.


Stern station cut out, sanded and assembled.  Edges are tapered so that the strips will lay flat..


The bow block.  One of the reasons I liked the North Star is because of the bi-furcated bow. The bottom of the bow is the cut water allowing the upper sectionride up and over waves.  The above picture is of my lay up to create the bow block.  I laminated Maple and Cherry making sure to alternate the grain direction.


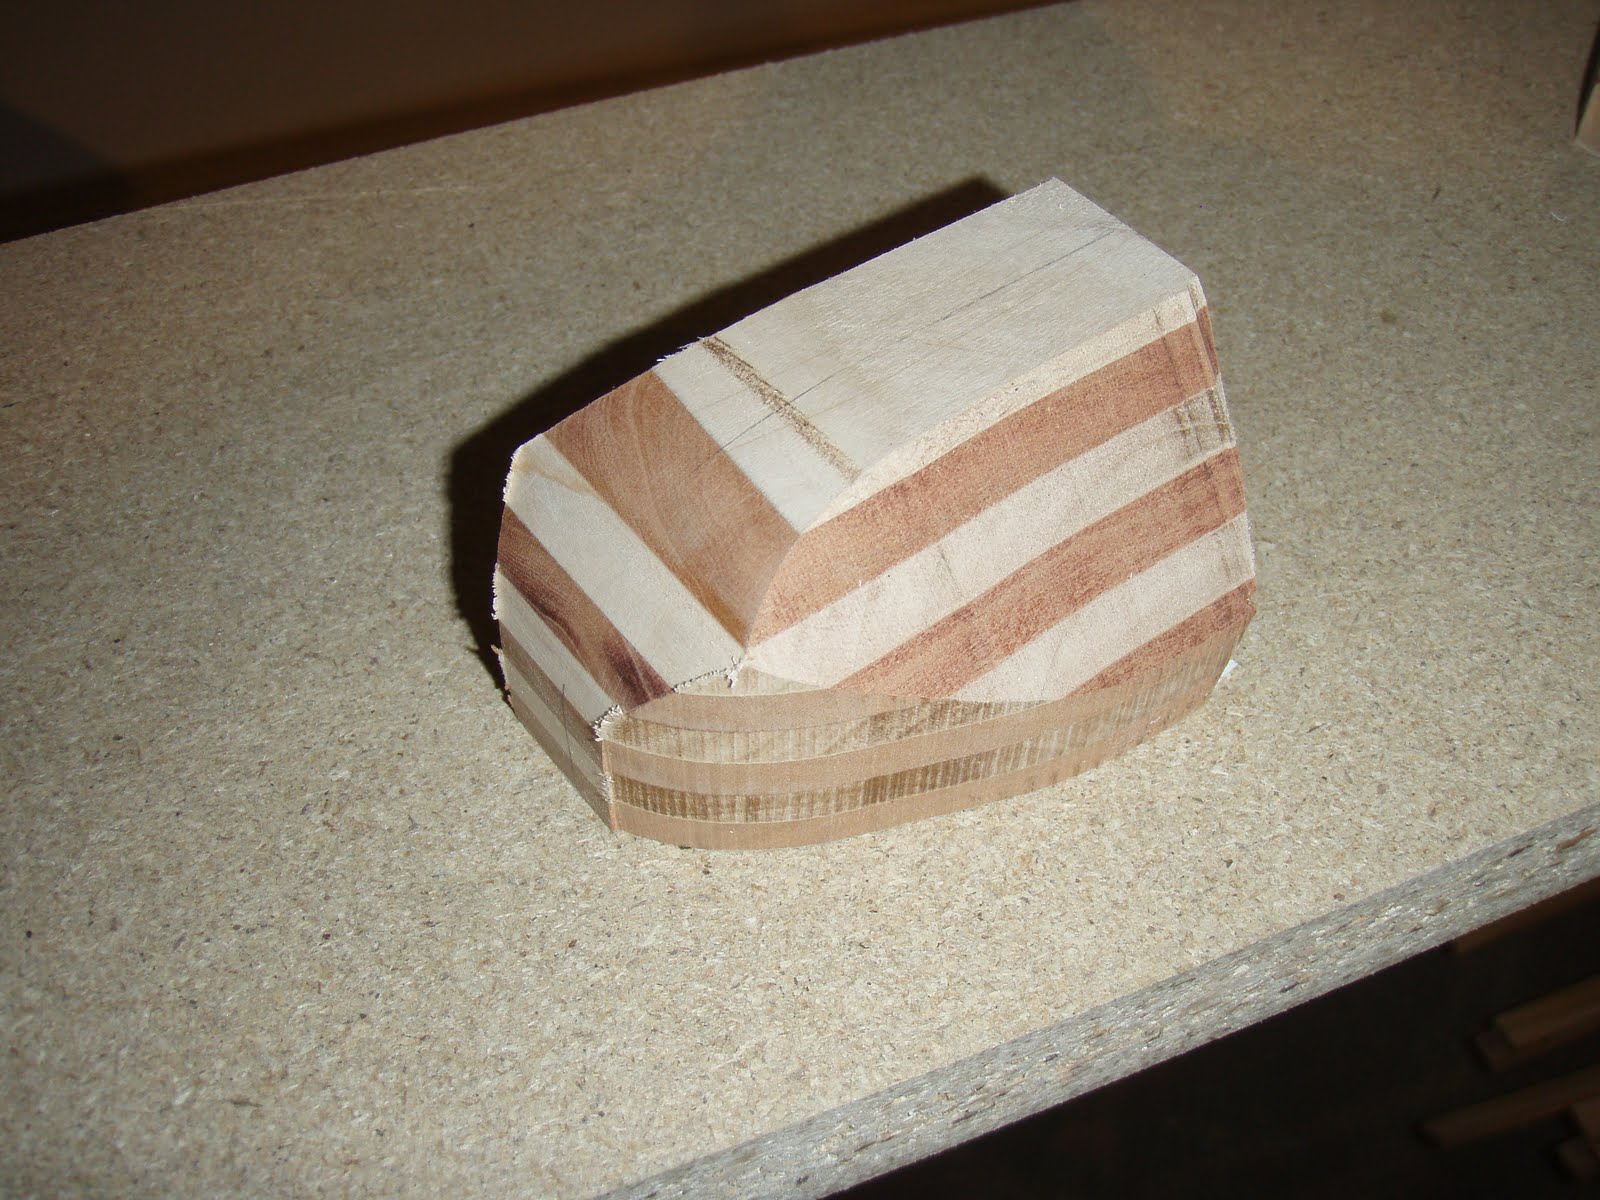
Bow block rough cut out.


 Bow block shaped and sanded, still needs a good final sanding but It's getting there.   Note to self: Not sure if I'd choose this combination of material again, very hard to sand.


Here is the bow temporary attached to station #1.  Position is off a bit but will be permanently mounted later.  Thanks for pointing that out Et.


Bow attached to station #1 and mounted to the 'L' brackets.  All stations will be mounted to the 'L' brackets.


The boards.  All cedar, mostly clear only a few small knots, nice color.


Boards ripped and cleaned up.  I have elected to use 3/16" tk x 3/4" wide strips.  3/16" strips are easier to bend and will reduce weight by 25% over using 1/4" tk strips.  I was very fortunate (I think), 2 of the boards are dark cinnamon color at one end and blond at the other, could make for some very interesting patterning.


Starting to strip up the stern section.  The bow and stern sections are build first, mounted to their respective stations then combined to the hull.  I have elected to use (2) dark strips at the shear line then blond.


Here you can see how much the wood is bent.  On the stern piece I planned down the strips to 1/8" so they would bend better. Lots of clamps, hot glue for wood, staples and patience.


Here is an example of the curve/twist you can achieve by using a heat gun.  I dont have an industrial type, I'm using my heat gun that I use to shrink the covering of my RC airplanes.  May take a few seconds longer but it works just fine.  I was struggling getting the strips to lay flat on the stern assembly then I came across (in the instructions no less) where you are supposed to heat the strip, bend it, twist it, whatever you need and the strip should lay nice and flat against the station without using force.  I suppose it pays to read a little ahead, would have saved me a little headache.  Live and learn I guess.


 Didn't like how the first stern assembly turned out so I re-did it.  top picture is the first layer, btm picture shows the bottom layer sanded and the top layer starting to be applied. This one turned out much nicer than the first one.


The strong back with the stations temporarily positioned.  This is probably one of the most important steps, the positioning needs to be spot on.  I'm going to check, recheck and triple check this set up.  You can see the string strung from bow to stern, this is used as a datum, all measurements to set the rocker are made from this line. (oh just never mind the mess in the back ground..  :)  )  A line was transferred down from the string to the strongback to give me a reference point.  I will use a level to position the stations, clamp, double check, fix in place and triple check.


No I'm not making bird houses....  I cut holes in the boards that the datum string is attached to so I can sight down the stations to make sure the vertical lines line up.


 Stern sections removed from the stations for a quick sanding.  Still need to trim them up a bit, reattach them to the stern station after the station is mounted to the brackets.


 Well, I didn't like the way the the curves looked when I temporarily attached strips to the stations, something in my setup was a little off so I took everything apart.  I restrung the string, added another string at the bottom, lined the strings up with a plumb bob, re-drew the lines on the brackets, re-attached (temporarily) the stations and set up a few strips..... Much better this time.  I have a little tweaking to do yet but I'm definitely on the right path this time. ***Note to self, if all else fails read the directions***   I need more clamps.... You can never have to many clamps, I am finding this out very quickly.


**Select the Striping tab at the top of the page for further information.**


Thanks for your support
(any donations will only be used for this project)